Logging Production
Production records track completed work - what was done, how much, when, and optionally at what cost. You can log production from a project or project site's Production section.
Navigating to Production
- Open a Project or Project Site.
- Expand the Production section.
- You'll see the production table with any existing records, and a "+" button to add new production.
Bulk Entry Mode
The primary way to log production is through bulk entry, which lets you add multiple rows at once.
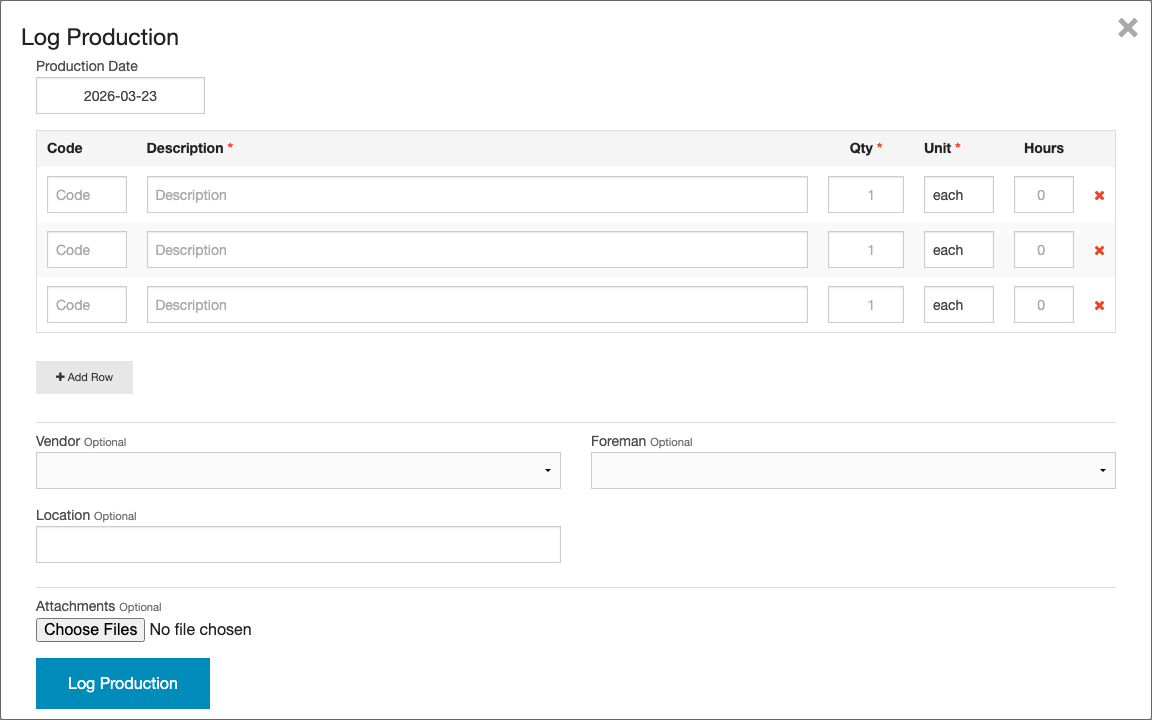
- Click the + add production button.
- A form appears with a table where each row represents one production record.
- For each row, fill in:
- Code — Start typing to search your rate card. Selecting a code auto-fills description, unit, cost, and price.
- Description — What work was completed (required).
- Quantity — How much was completed (required, minimum 1).
- Unit — The unit of measure (required).
- Hours — (Optional) Labor hours associated with this work.
- Category — (Optional) A pricing category.
- Vendor — (Optional) Assign a vendor to this entry.
- Set the Production Date — this date applies to all rows in the batch. Defaults to today.
- (Optional) Attach files using the Attachments field below the entry table. Files are linked to all records in the batch.
- Add more rows as necessary.
- Click Save to create all records at once.
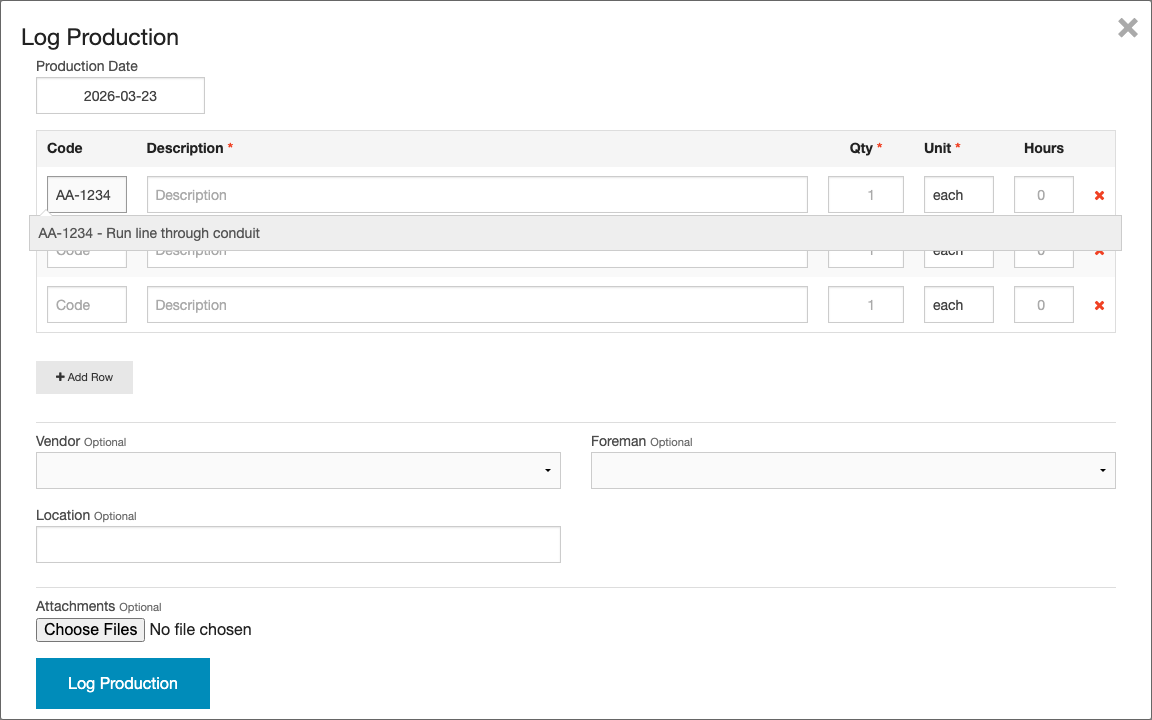
When you select a code from the autocomplete, the description, unit, category auto-fill from your rate card. You can still override any of these values. Cost & Price will be added to the created records. Code auto-suggest also works when editing existing records.
When you save a bulk entry with multiple rows, the records are automatically linked together as a production group. Attachments uploaded during bulk entry belong to the group and are visible from any record within it.
The Production Table
After records are created, they appear in the production table with the following columns:
| Column | Description |
|---|---|
| Date | When the work was performed |
| Code | The rate card code, if any |
| Description | What work was completed. A paperclip icon with count appears when files are attached to the record or its production group. |
| Qty | Quantity completed |
| Unit | Unit of measure |
| Hours | Labor hours for this work (if entered) |
| Cost | Internal cost (Accounting permission only) |
| Price | Selling price (Accounting permission only) |
| Vendor | Who submitted the record (if from a vendor share) |
| Status | Approval status and conversion status. Shows "Pending" or "Approved" for approval, and "Invoiced" / "Inv. Paid" or "Payout" / "Paid Out" with links for converted records. |
| Created By | Who created the record |
| Actions | Edit, history, delete, approve/reject buttons |
The table supports sorting and filtering through the column headers.
By default, the production table shows records from the last 30 days. Use the date range picker above the table to select a predefined range or set custom dates.

Editing a Record
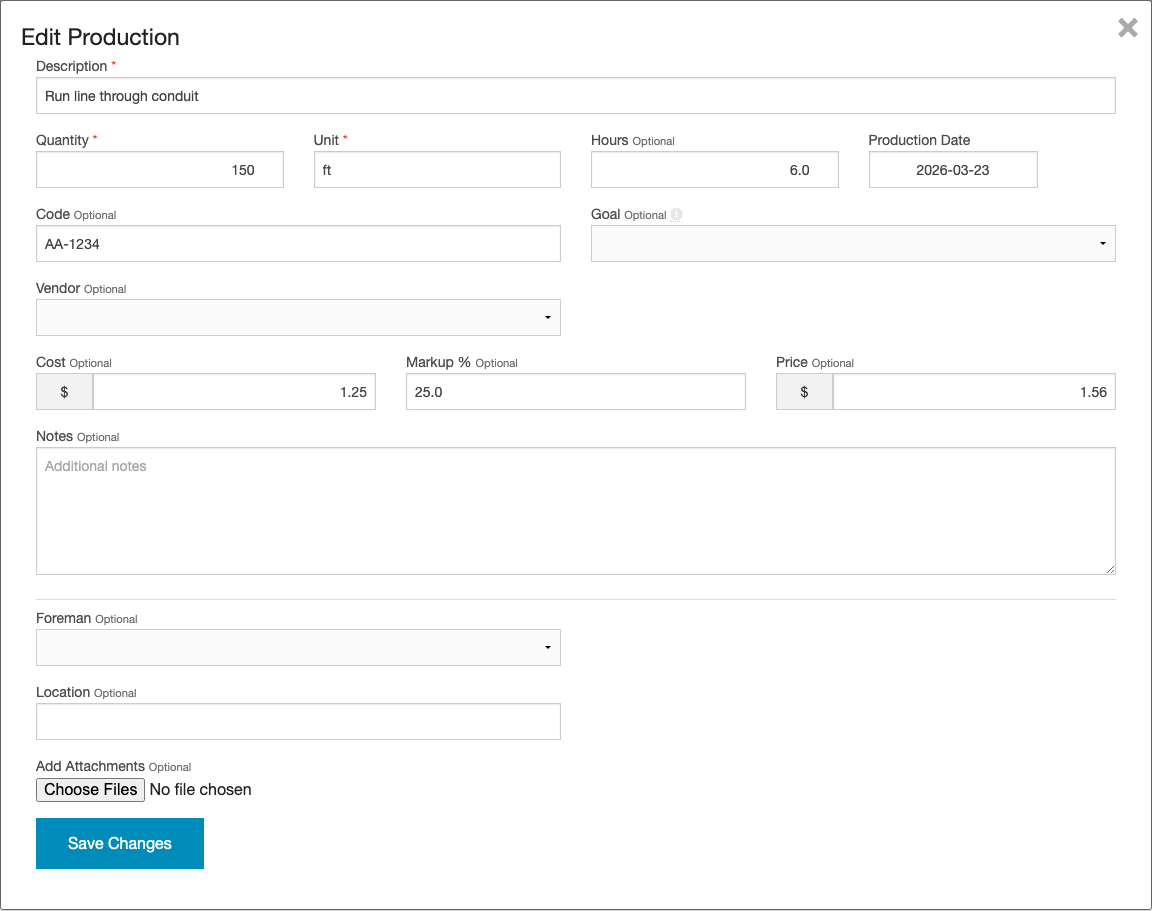
- Click the edit icon on a production record.
- A modal opens with all editable fields: description, quantity, unit, hours, code, cost, markup, price, notes, file attachments, and any custom fields. You can add or remove file attachments from individual records here.
- Make your changes and click Save.
Cost/Price Discrepancy Highlighting
If a production record's cost or price differs from the rate card value for its code, the mismatched field is highlighted in red. This helps you quickly spot records where pricing doesn't match your standard rates. Mismatch detection compares against items from the project's assigned rate cards. If no rate cards are assigned to the project, the comparison uses all company rate cards.

Viewing Production History
Every production record maintains an audit trail. To view it:
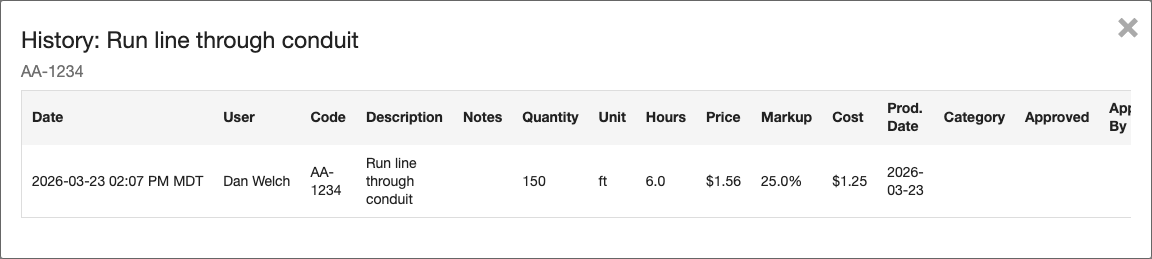
- Click the history icon on a production record.
- A modal opens showing all changes made to the record in a column-per-field layout, including:
- Who made each change
- When the change was made
- Which fields were modified and their old/new values

Custom Fields
If your company has configured custom fields for production, they will appear as additional columns in the production table and as fields in the add/edit forms. Custom fields are configured at the company level.
Each custom field has a Show in Table option that controls whether it appears as a column in the production table. Fields that are hidden from the table are still available in the add/edit forms.