Connecting puush to QuickBooks (Enterprise Only)
- Log in with an Administrator account.
- Navigate to the Administration page.
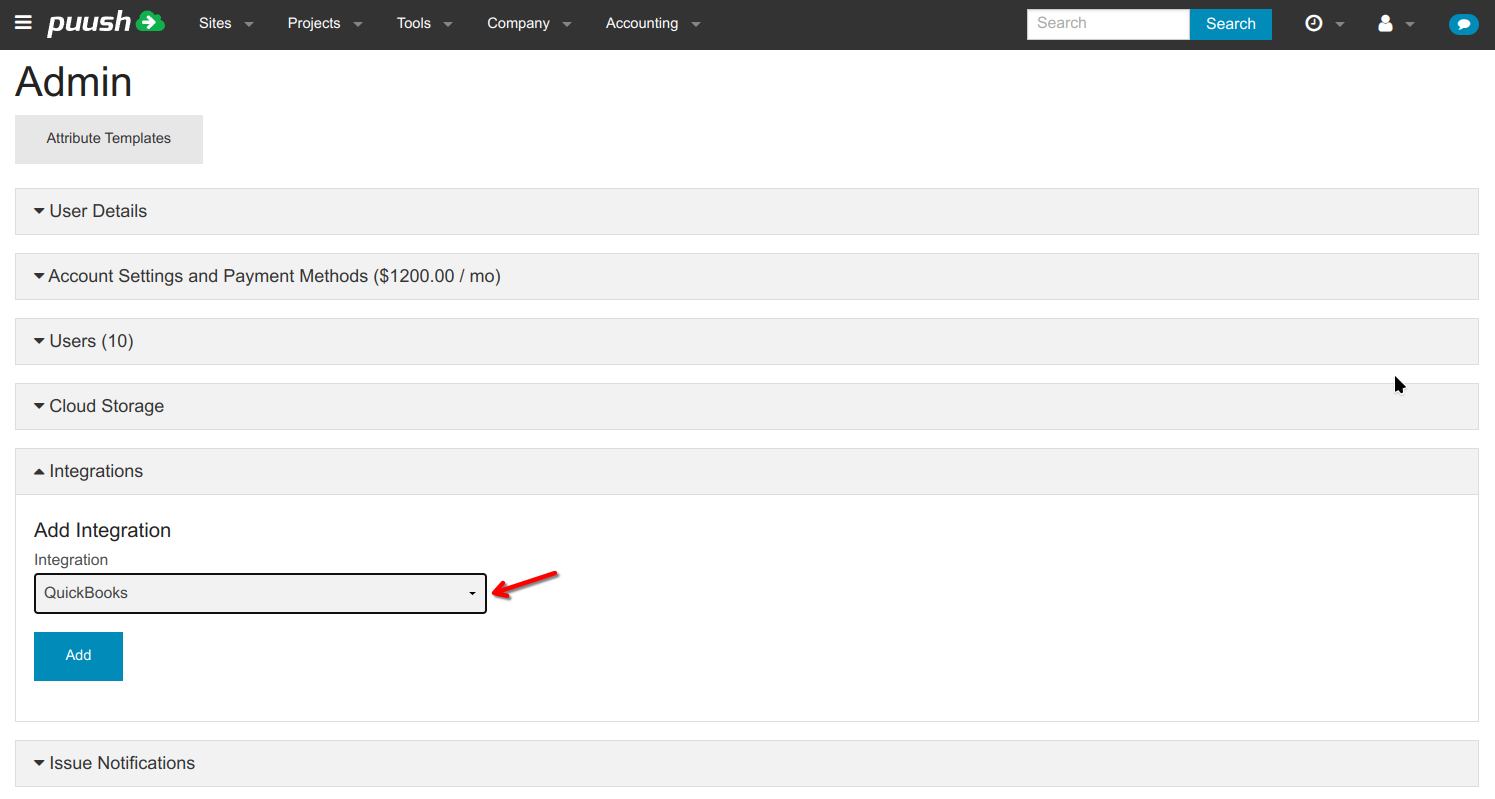
- Scroll down to the "Integrations" section.
- Select "QuickBooks" from the Integration dropdown and click "Add".
- Click on "Enable QuickBooks"
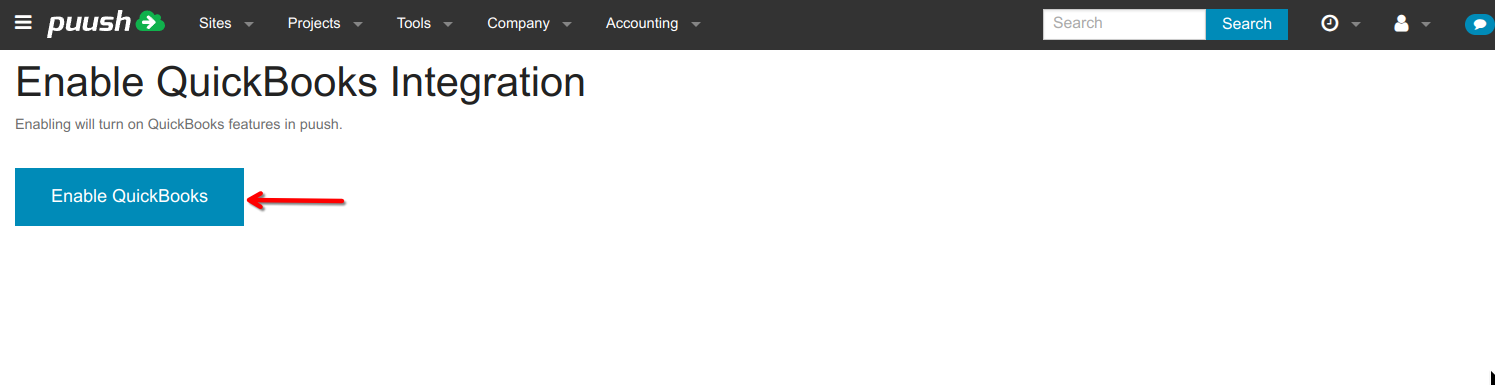
- Log in to QuickBooks with as an administrator and authorize the connection with Puush.
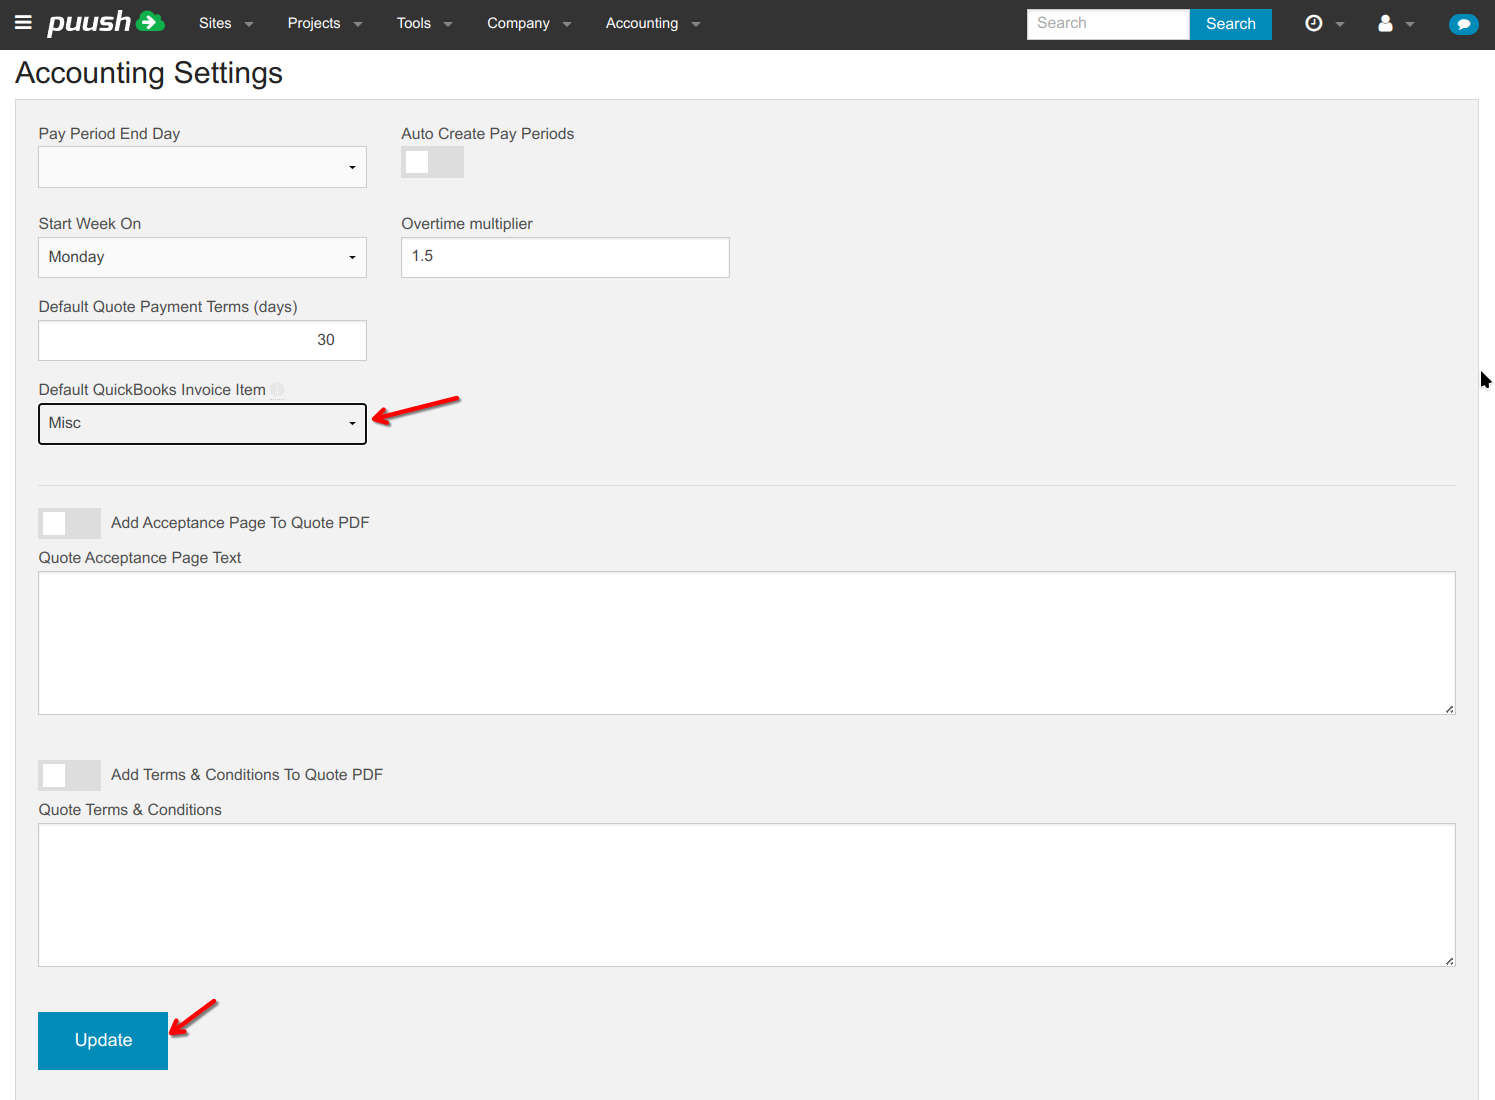
- Navigate from the top menu to "Accounting -> Settings".
- Scroll Down to the Accounting Categories Section. Categories defined here can be used to organize Project and Site budget line items. Puush will attempt to match these categories with QuickBooks Products & Services with the same name. In QuickBooks, ensure that each category is created as a Non-Inventory Product or as a Service.
- In QuickBooks, create a Service to use as a default for invoice line items without a Category. For example, create a Service named "Misc".
- Select a "Default QuickBooks Invoice Item" from the dropdown menu. Here we are using the "Misc" service created above. Hit "Update" to save this setting.
- Your QuickBooks integration is now ready to use. It is recommended to syncronize your puush clients and vendors with your QuickBooks customers. See this guide for instructions.